The temps are starting to drop, and the smell of wood smoke is in the air. That’s when veteran homeowners know it’s time to do these six things if they want to avoid trouble or overspending.
#1 Buy Appliances
Image: Pierre Desrosiers/Getty
Whisper to them. Do a rain dance. Whatever it takes to get your old appliances to wait until fall to go on the fritz. Manufacturers bring out their latest models during the fall, and store owners offer big sales on appliances they want to move out — like last year’s most popular dishwasher. So September, October, and November are great months to buy.
But October is right in the middle, when there’s still plenty of selection and retailers might be more willing to haggle.
Refrigerators are the exception because new models don’t come out until spring.
Most have a switch to allow the ceiling fan blades to rotate either clockwise or counterclockwise. One way pushes air down to create a nice breeze, and the other sucks air up, helping to distribute the heat. Think counterclockwise when it’s warm and clockwise when it’s cool.
Daylight is about to dwindle so why not get as much of it as you can? Clean off all the bugs, dust, and grime from your windows while the weather is still warm enough to do so. For streak-free windows, combine ¼-cup of white vinegar with ¼ to ½ teaspoon of eco-friendly dish detergent and 2 cups of water.
If window cleaning isn’t a DIY job at your home, schedule a professional window cleaner (who, unlike most of us, is able to do it even when temperatures plummet) before the end of the month. The closer it gets to the holidays, the busier they get. Bright sunshine on winter’s darkest days makes it totally worthwhile.
To ensure your family will be able to feel their toes all winter, schedule early in the month for your heating unit to be serviced. As temperatures drop, service companies get busier.
Whether you hire your heating company’s technician or a contractor to do it, they’ll clean soot and corrosion from the combustion chamber, replace filters, and check the whole system for leaks, clogs, and damage. Nothing pairs with a pending blizzard better than the assurance that you’ll be weathering the storm with warm air piping through the vents and cocoa in hand.
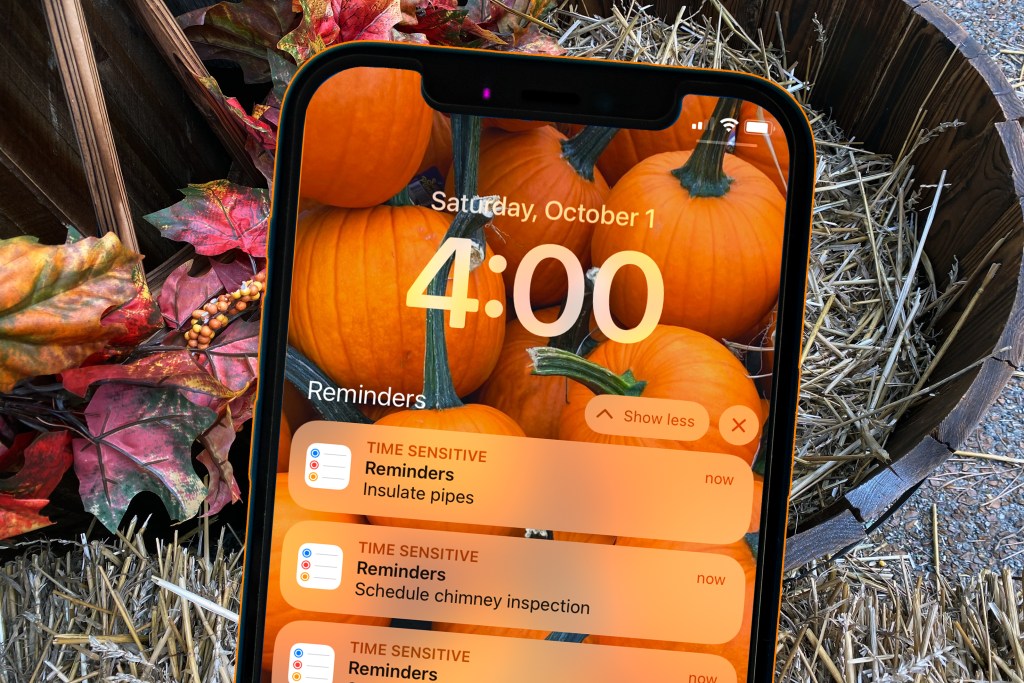
It’s time to dust off and sweep the chimney! Best to hire someone who knows wood-burning fireplaces. A professional chimney sweep will ensure your wood-burning fireplace burns more efficiently and will help prevent chimney fires and carbon monoxide poisoning during the winter. So, yeah, it’s pretty important.
Tip: If you don’t already have a chimney cap, this is also the time to add one to stop wild outdoor critters from crawling down it — and (yikes!) into your house.
If you’ve ever dealt with a burst pipe, you know it’s a sad, wet disaster worth preventing. To avoid the stressful (not to mention, expensive) ordeal, prep your home’s exposed pipes with foam or heat tape — choosing which one will work best with your climate. Remember: The most at-risk pipes are often those in unheated areas such as an attics, crawl spaces, and garages, so secure those first.
“Visit HouseLogic.com for more articles like this. Reprinted from HouseLogic.com with permission of the NATIONAL ASSOCIATION OF REALTORS®.”
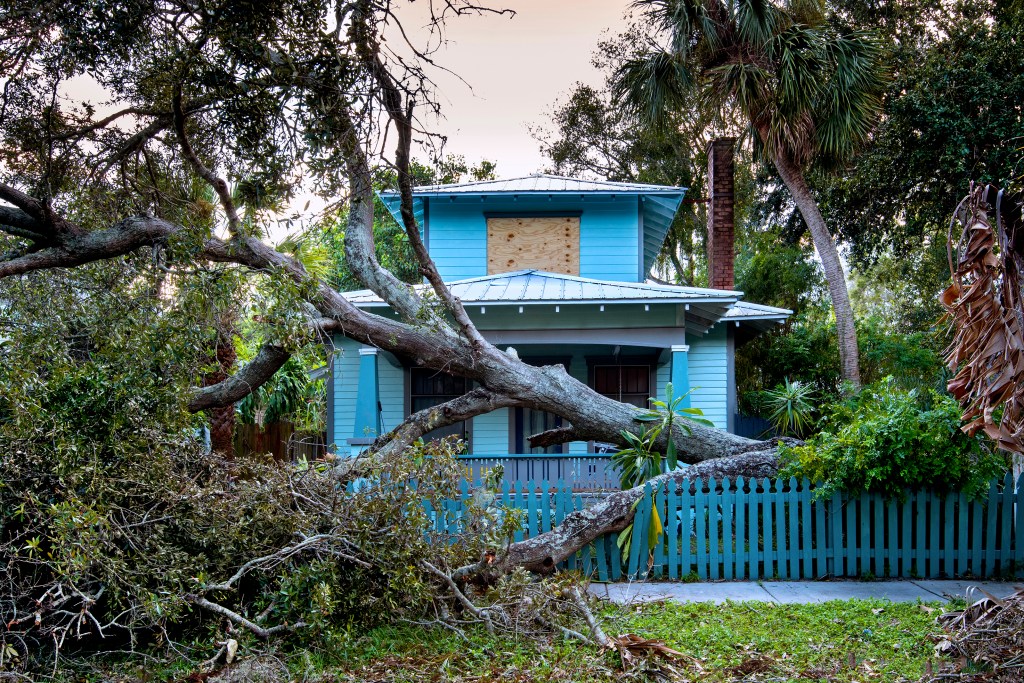
We’re in the peak of the busiest hurricane season in years. Is your home properly insured?
Image: John Coletti/Getty
Hurricanes are a force to be reckoned with, especially since the season sticks around so long and does damage beyond coastal areas. For example, the Atlantic coast hurricane season lasts from June through November, with storms likely to peak from August to October. And even though the East Coast and Gulf Coast are most at risk, wind and rain damage can extend well inland.
Long before a hurricane makes landfall, homeowners should assess their insurance needs. That’s because most insurers won’t issue policies when a storm is imminent. Several factors play into the cost of hurricane insurance. Those include where you live, what your house is worth, and how much deductible you’re willing to pay.
Hurricane Insurance: What’s Covered?
Hurricane coverage varies by state. In general, homeowners insurance will cover damage from wind and wind-driven rain. So, if high winds rip off your shingles and water penetrates the roof, the damage is usually covered. Before choosing a policy, read it carefully and look for limitations on wind and water damage.
The fine print is especially important. That’s because more insurers are excluding damage from hurricanes altogether, says Frank Darras, an insurance attorney in Ontario, Calif. If you live in states like Florida, Texas, or Louisiana, you may need to purchase homeowners insurance with supplemental hurricane coverage. Or, you may want to buy separate windstorm and flood policies.
Even homeowners policies that don’t exclude hurricanes will typically exclude damage from floods caused by rising water. Rising water can result from groundwater surge, tidal surge, or overflowing lakes and rivers. Flood insurance is available to most homeowners through the National Flood Insurance Program.
Homeowners at the greatest risk from high winds should check with their state insurance commissioner to help determine what additional coverage is needed. States threatened by hurricanes usually operate high-risk insurance pools that offer hurricane coverage, says David Miller, head of Brightway Insurance in Jacksonville, Fla.
Hurricane Insurance: How Much Does it Cost?
The cost of comprehensive hurricane coverage can vary, but averages $2,555 per year. On top of the premium, policies issued in states that are most susceptible to storms can come with hurricane deductibles. They typically range from 1% to 5% of the insured value of a home, but can be higher in high-risk coastal areas.
Hurricane deductibles usually kick in when damage results from a named storm. That means if your house is insured for $300,000 and it’s damaged in a hurricane, the hurricane deductible will range from $3,000 (1% of insured value) to $15,000 (5%). Although some states allow homeowners to choose the hurricane deductible, others set it. For example, the Alabama Insurance Underwriting Association offers wind/hail/hurricane deductible options of 1%, 2%, 5%, and 10%. Remember, the higher the deductible, the lower the premium.
Homeowners should review their hurricane risks and current coverage to see whether they need more insurance, Darras says. In addition, he suggests factoring in the condition of the house. For example, new constructions are more likely to be built to withstand high winds. On the other hand, older homes weren’t subject to stricter building codes, so, they can be more vulnerable. You’ll want to talk to a home inspector or a contractor to get the lowdown on condition.
How to Lower Cost of Coverage
There are ways to lower the costs of coverage. Hurricane-mitigation improvements, such as storm shutters and secondary water protection (essentially an extra layer of water-proofing between shingles and the roof sheathing), are options. Miami is located in one of the most expensive states for homeowners insurance in the country. An older Florida masonry home with a replacement value of $300,000 and coverage for $150,000, with a 2% hurricane deductible, would have an annual premium averaging $9,204 without wind mitigation, protection on your home that helps decrease damage from strong winds like a hurricane. With wind mitigation, the average annual premium would be $4,160.
If your current homeowners policy sufficiently addresses wind damage but not flooding (a common situation), consider a separate flood policy. Just an inch of floodwater in your home can cause $25,000 of damage to your home, according to the Federal Emergency Management Agency. The average flood policy costs $738 per year, according to Bob Vila.
10 Recent Hurricanes and Tropical Storms
DISASTER
DATE
CPI*-ADJUSTED ESTIMATED COST
Hurricane Nicholas
September 2021
$1.1 billion
Hurricane Ida
August 2021
$76.5 billion
Tropical Storm Fred
August 2021
$1.3 billion
Tropical Storm Elsa
July 2021
$1.3 billion
Tropical Storm Eta
November 2020
$1.6 billion
Hurricane Zeta
October 2020
$4.7 billion
Hurricane Delta
October 2020
$3.1 billion
Hurricane Sally
September 2020
$7.9 billion
Hurricane Laura
August 2020
$25.3 billion
Hurricane Isaias
August 2020
$5.2 billion
*Consumer Price Index
Source: National Centers for Environmental Information
Review Your Policy Now
Procrastination isn’t your friend. Some policies have a waiting period before taking effect. And once a tropical storm is named or a hurricane watch declared, you’re unlikely to be able to purchase a policy to cover that storm. So, allow enough time to determine your needs and gather information. Set aside a day to review your current policy and get quotes on additional coverage.
“It comes down to risk tolerances,” Darras says. “What does your policy cover? Where do you live, and what is the risk you’re facing? What can you afford? And how much risk are you comfortable with? Those are the questions you need to ask when you’re deciding on purchasing more coverage.”
“Visit HouseLogic.com for more articles like this. Reprinted from HouseLogic.com with permission of the NATIONAL ASSOCIATION OF REALTORS®.”
Will remodeling your kitchen increase your home value? Sure. Will you love it? Homeowners almost always do, according to the “Remodeling Impact Report” from the National Association of REALTORS®.
But you’ll love it even more if you can bump up that ROI.
How to add more money to your love: A little sweat equity can save you thousands if you’re willing to tackle some tasks such as demolition and painting.
Keeping the same electrical and plumbing footprint will save even more, as will refacing your cabinets.
Basement Conversion
Do It For: Love
Estimated Cost for a Pro Job: $40,000
ROI: 63%
Converting a basement to a living area is the very definition of a project done for love. It instantly makes your home more functional by giving you more living space — without increasing your home’s footprint. Just so you know, though, it can be a big-ticket remodel.
How to add more money to your love: Think about how you’ll use the space. Will you be working, throwing parties, or watching Netflix? If you can make an open floor plan work, you’ll save the cost of framing, drywalling, and painting more rooms.
One of the best returns on a home investment is hardwood floors. They’re beautiful, durable, and timeless — and one of the smartest things you can do, too.
Many homeowners now want (and even expect) hardwood floors. And when done in keeping with the home’s layout and neighborhood, they can add 2.5% to the sale price.
How to get even more ROI: If you already have wood floors and they’re still in good shape, why not refinish them and save a little money? It costs around $3,000 and recovers 100% of its value at resale.
In-Ground Swimming Pool
Image: Malin Cropper/Offset
Do It For: Love
Estimated Cost for a Pro Job: $57,500
ROI: 43%
Even if you adore the thought of diving into the clear, blue water of your very own backyard swimming pool, when you hear about the 43% ROI (not to mention the high project cost and the years of maintenance), the idea of installing one may feel like a wet blanket. And let’s face it: There’s no DIYing an in-ground pool to trim costs.
A better bet for your ROI: If you’re more of a sit-by-the-water type, consider a waterfall or fountain. It’ll bring you water-side happiness while also upping curb appeal. Or DIY a small (removable) soaking pool and mini-deck — you’ll get all the watery goodness without the high cost and maintenance.
But! If you just can’t stop dreaming about the real deal, don’t let the low return on investment deter you. Being happy while you’re in your home is just as important, maybe more so.
Adding a new bathroom seems like an ROI no-brainer. And yet, it’s not. So ask yourself why you’re fantasizing about the update. If it’s because you’re legitimately short on toilets, it’s worth considering.
According to the National Association of Home Builders, buyers tend to favor houses with an equal number of bathrooms and bedrooms. And if you’re in a four-bedroom with one bathroom, you probably do, too.
How to add some money to your love: If a new bathroom will boost your happiness (or sanity), there are ways to make the most of your remodeling budget. Adding one within the existing footprint of your home and next to existing plumbing will save thousands. And like a kitchen update, the bathroom is a place where DIY pays off. Doing your own paint or demo can save a bundle.
While it’s not the dreamiest home investment, a new garage door is one of the quickest ways to make your home shine, especially if it’s front and center like many of today’s homes. It’s also one of the most affordable.
How to make your garage door pay off more: In addition to improving curb appeal, an insulated door on an attached garage can help lower energy bills, which will earn back money every month — and generate a little joy in your heart.
Do It For: Love and Money (depending on where you live)
Estimated Cost for a Pro Job: $14,000
ROI: 71%
There’s something dreamy about cozying up to a table under the trees and digging into a meal you’ve cooked under the open sky.
But before you give in to the call of a backyard cucina, consider your climate and neighborhood.
While 71% ROI is good, that’s a number that includes homes from sunny Tucson to frigid Fargo. The more you can use the outdoor kitchen, the better your ROI will be.
If your neighbors prefer a simple backyard grill and plastic lawn chairs, your ROI may not be so great.
How to add even more money to your love: Stick to a built-in charcoal or gas grill and skip the cooktop to avoid running electricity. Use inexpensive string lights from the wall outlet on your home’s exterior to illuminate the space.
Also, situate the outdoor kitchen near the back door, and you can use the plumbing inside rather than paying extra for an outdoor sink.
Plant Trees
Image: Evan Sklar/Offset
Do It For: Love and Money
Estimated Cost: $50 to $100 for a 6- to 7-foot deciduous tree
ROI: 100% or more
Planting trees today is one of the smartest ways to reap financial rewards tomorrow. A well-positioned tree shades the house in summer and shields it from harsh winds in winter, shaving money off your utility bills — as much as $250 per year.
Putting on a new roof tops the home project list in rate of return. This is a relatively high-dollar item, but wow — that 109% ROI sure makes your bottom line do the happy dance.
And even better: REALTORS® say a new roof helps them make a sale 32% of the time.
FYI on your roof’s ROI: Naturally, the longer the time span between your roof replacement and your home sale, the lower that ROI becomes. But even if you aren’t thinking of selling right away, if your roof is in disrepair, a new one is the wise choice.
It improves energy efficiency (an Energy Star-certified roof can reduce peak cooling demand 10%-15%); it ups curb appeal; and it protects you from mold, critters, and the dreaded water damage.
“Visit HouseLogic.com for more articles like this. Reprinted from HouseLogic.com with permission of the NATIONAL ASSOCIATION OF REALTORS®.”
Posted inReal Estate News|Taggedimprovement|Comments Off on Get the Best Return on Your Investment in Home Improvements
#1 Not Knowing Where the Main Water Shutoff Valve Is
Water from a burst or broken plumbing pipe can spew dozens of gallons into your home’s interior in a matter of minutes, soaking everything in sight — including drywall, flooring, and valuables. In fact, water damage is one of the most common of all household insurance claims.
Quick-twitch reaction is needed to stave off a major bummer. Before disaster hits, find your water shutoff valve, which will be located where a water main enters your house. Make sure everyone knows where it’s located and how to close the valve. A little penetrating oil on the valve stem makes sure it’ll work when you need it to.
#2 Not Calling 811 Before Digging a Hole
Ah, spring! You’re so ready to dig into your new yard and plant bushes and build that fence. But don’t — not until you’ve dialed 811, the national dig-safely hotline. The hotline will contact all your local utilities who will then come to your property — often within a day — to mark the location of underground pipes, cables, and wires.
This free service keeps you safe and helps avoid costly repairs. In many states, calling 811 is the law, so you’ll also avoid fines.
#3 Not Checking the Slope of Foundation Soil
The ground around your foundation should slope away from your house at least 6 inches over 10 feet. Why? To make sure that water from rain and melting snow doesn’t soak the soil around your foundation walls, building up pressure that can cause leaks and crack your foundation, leading to mega-expensive repairs.
This kind of water damage doesn’t happen overnight — it’s accumulative — so the sooner you get after it, the better (and smarter) you’ll be. While you’re at it, make sure downspouts extend at least 5 feet away from your house.
This goes hand-in-hand with not knowing where your attic access is located, so let’s start there. Find the ceiling hatch, typically a square area framed with molding in a hallway or closet ceiling. Push the hatch cover straight up. Get a ladder and check out the depth of the insulation. If you can see the tops of joists, you definitely don’t have enough.
The recommended insulation for most attics is about R-38 or 10 to 14 inches deep, depending on the type of insulation you choose. BTW, is your hatch insulated, too? Use 4-inch-thick foam board glued to the top.
Hanging shelves, closet systems, and artwork means drilling into your walls — but do you know what’s back there? Hidden inside your walls are plumbing pipes, ductwork, wires, and cables.
You can check for some stuff with a stud sensor — a $25 battery-operated tool that detects changes in density to sniff out studs, cables, and ducts.
But stud sensors aren’t foolproof. Protect yourself by drilling only 1¼ inches deep max — enough to clear drywall and plaster but not deep enough to reach most wires and pipes.
Household wiring runs horizontally from outlet to outlet about 8 inches to 2 feet from the floor, so that’s a no-drill zone. Stay clear of vertical locations above and below wall switches — wiring runs along studs to reach switches.
#6 Cutting Down a Tree
The risk isn’t worth it. Even small trees can fall awkwardly, damaging your house, property, or your neighbor’s property. In some locales, you have to obtain a permit first. Cutting down a tree is an art that’s best left to a professional tree service.
Here’s a fun laundry room fact: The average American family washes 300 loads of laundry a year, spending as much as $1.08 per load, for a yearly total of $324.
Most laundry room expenses come from heating water for washing and heating air for drying. But these costs aren’t set in stone, and you can save money by following these energy-reducing tips.
Get the Most from Your Washer
Ninety-percent of the cost of running a washer goes to heating water. Here’s how to save money while getting your clothes clean.
Get the Most from Your Dryer
5. Spin faster. The faster you spin clothes in the washer, the less time they’ll need in the dryer. If you have the option, chose a faster spin cycle.
6. Clean lint filters. Remove lint after every load, and clean ducts annually. Your clothes will dry faster, using less energy.
7. Warm it up. If possible, locate your dryer in a warm laundry room rather than in a cold basement. The warmer the air coming into the dryer, the less energy your machine will use to heat it up.
8. Go gas. Drying a load of laundry in a gas dryer generally costs less per load than an electric dryer.
9. Keep it full. Dry only full loads and try not to mix fast- and slow-drying clothes — a practice that wastes energy by continuing to dry clothes that are no longer wet.
10. Let nature help out. When the weather is warm, cut your energy costs by drying clothes outside on a clothesline. If homeowners association regulations don’t allow you to set up a clothesline outside, use a standalone drying rack inside.
So you’re thinking about buying your first home. Your very own house (and mortgage). A place to call — and make — your own.
It’s a big move, literally and figuratively. Buying a house requires a serious amount of money and time. The journey isn’t always easy. It isn’t always intuitive. But when you get the keys to your new home — that, friend, can be one of the most rewarding feelings pretty much ever.
The key to getting there? Knowing the home-buying journey. Knowing what tools are at your disposal. And most importantly? Creating relationships with experts who can help you get the job done.
That’s where this guide comes in. We’ll show you not only the major steps you’ll take during the home-buying process, but also explain the relationships and experts you’ll need along the way. We’ve even made a handy infographic that outlines the home-buying process from start to finish.
Oh sure, everybody wants to jump right into open houses. But before you even set foot into a foyer, you should identify your list of “musts” and “wants.” This list is an inventory of priorities for your search. And there’s so much to decide: Price, housing type, neighborhood, and school district — just to name a few.
If you’re planning to buy a home with a partner (in life or in real estate), fill the worksheet out with them. You want to be on the same page while buying a house. If you’re not, you’ll be less able to give agents or lenders the information they need to help you. And you risk wasting time viewing homes you can’t afford — or don’t even want in the first place.
Your relationship with your real estate agent is the foundation of the home-buying process. (And your agent = your rock.) He or she is the first expert you’ll meet on your journey, and the one you’ll rely on most. That’s why it’s important to interview agents and find the agent who’s right for your specific needs.
Choose a Lender
Once you’ve found your agent (AKA, your new best friend), ask him or her to recommend at least three mortgage lenders that meet your financial needs. This is another big step, as you’ll be working with your lender closely throughout the home-buying process.
Pick a Loan (It’s Not So Bad)
Once you’ve decided on a lender (or mortgage broker), you’ll work with your loan agent to determine which mortgage is right for you. You’ll consider the percentage of your income you want to spend on your new house, and you’ll provide the lender with paperwork showing proof of income, employment status, and other important financials. If all goes well (fingers crossed) you’ll be pre-approved for a loan at a certain amount. (Sweet.)
Go to Showings and Look Around
Now that you have both an agent who knows your housing preferences and a budget — and a lender to finance a house within that budget — it’s time to get serious about viewing homes. Your agent will provide listings you may like based on your parameters (price range, ZIP codes, features), and will also help you determine the quality of listings you find online.
Then comes the fun part: showings, which give you the unique opportunity to evaluate properties. Your agent will help you navigate showings, whether virtual or in-person.
Make an Offer
Once you find the home you want to buy, you’ll work with your agent to craft an offer that not only specifies the price you’re willing to pay but also the proposed settlement date and contingencies — other conditions that must be agreed upon by both parties, such as giving you the ability to do a home inspection and request repairs.
Negotiate, Negotiate, Negotiate
Making an offer can feel like an emotional precipice, almost like asking someone out on a date. Do they like me? Am I good enough? Will they say yes? It’s stressful! Some home sellers simply accept the best offer they receive, but many sellers make a counteroffer. If that happens, it’s up to you to decide whether you want your agent to negotiate with the seller or walk away. This is an area where your agent can provide real value by using their expert negotiating skills to haggle on your behalf and nab you the best deal.
Get the Place Inspected
If your offer is accepted, then you’ll sign a contract. Most sales contracts include a home inspection contingency, which means you’ll hire a licensed or certified home inspector to inspect the home for needed repairs, and then ask the seller to have those repairs made. This mitigates your risk of buying a house that has major issues lurking beneath the surface, like mold or cracks in the foundation. (No one wants that.) Here’s what to expect.
Ace the Appraisal
When you offer to buy a home, your lender will need to have the home appraised to make sure the property value is enough to cover the mortgage. If the home appraises close to the agreed-upon purchase price, you’re one step closer to settlement — but a low appraisal can add a wrinkle. Not one you can’t deal with. Here’s how to prepare.
Close the Deal
The last stage of the home-buying process is settlement, or closing. This is when you sign the final ownership and insurance paperwork and make this whole thing official. There’s some prep work you have to take care of first.
When it’s all said and done — break out the rosé. You’ll have the keys to your new home!
“Visit HouseLogic.com for more articles like this. Reprinted from HouseLogic.com with permission of the NATIONAL ASSOCIATION OF REALTORS®.”
Posted inReal Estate News|TaggedFirstHome|Comments Off on The Everything Guide To Buying Your First Home
Maintaining a yard isn’t for the faint of heart anymore. Severe weather means rains are heavier and more intense. Droughts last a long time and can be dangerous. Then there’s the trickle-down effect. Rising temps are causing more aggressive weeds, and longer frost seasons are giving insect pests more time to reproduce (shudder). But some homeowners have figured out how to change their landscaping to sync with area weather patterns and their desire to do other things than manage their yard and lawn. Here are nine tips from varied sources to help you win over weather – and go low maintenance at the same time.
#1 Pick Several Species of Plants.
Gardens and landscapes with several different species of plants can better resist pests, diseases, and just plain prolonged bad weather. Native plants are an excellent choice because they’re hardy and can support native wildlife. – Environmental horticulturist Kim Eierman, founder of EcoBeneficial!, from HGTV’s “Climate Change in Your Own Backyard”
#2 Replace or Reduce Your Lawn.
Some pros call exotic turf grasses “green deserts,” because the grasses have shallow roots and require a lot of work. Consider replacing them with native grasses that have deep roots. Little bluestem holds a lot of moisture but also tolerates periods of drought. – Kim Eierman
#3 Nix the Lawn, Opt for Ground Cover.
Step away from that lawnmower. Use ground cover instead of lawn and say goodbye to mowing. Ground cover retains carbon in the soil, tolerates drought, and prevents both erosion and invasives. More important, it renourishes the soil so you don’t have to continually fertilize it. – Susan Nugent, climate reality project leader, from “South Florida Sun-Sentinel”
#4 Create Rain Gardens.
Plants that need more water can be used in a rain garden, a wet area in your landscaping. Water-loving plants can bloom near a downspout with a rain barrel attached. During droughts, you can add stored water. – Susan Nugent
#5 Plant Pollinators.
They support about 35% of our food supply. When selecting plantings, use biodiversity – differing types of plants to benefit birds, butterflies, and bees. – Susan Nugent
#6 Choose Natural Mulch.
Like cedar, natural mulch keeps insects away. Pine bark mulch is often sold as nuggets, but the shredded form covers better and looks great throughout the season. It decays fairly quickly, enriching soil over time. – Tata & Howard, specialized water, wastewater, and storm water consulting engineering firm
#7 See the Pluses of (Some) Weeds.
Creeping Charlie is one weed hated by lawn-lovers because it can “spoil” a nice lawn and spread like crazy in part shade. But it’s a native plant with attractive flowers, and bees love it. – Henry Homeyer, blogger at gardening-guy.com, “Gardening: Give ‘Rewilding’ Your Lawn a Try,” from “Providence Journal”
#8 Add Stone or Gravel Pathways.
They work as firebreaks and reduce rain runoff. – Bob Vila, from “The 12 Biggest Landscaping Trends for 2022”
#9 Use Boulders and Large Stones.
It doesn’t get much lower maintenance than boulders and large stones. Plus, they conserve water. And they’re versatile and can be arranged in clusters, stacked as a retaining wall, or used to accent changes in elevation. – Ryan Plank, “How to Landscape with Boulders,” from “Lawn Starter”
“Visit HouseLogic.com for more articles like this. Reprinted from HouseLogic.com with permission of the NATIONAL ASSOCIATION OF REALTORS®.”
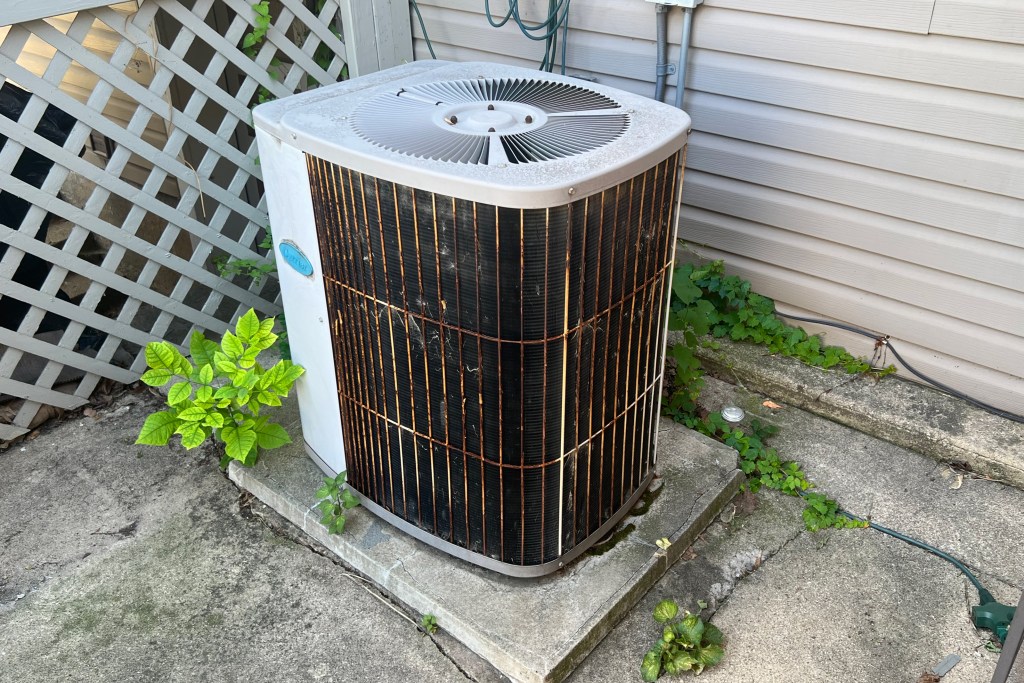
Here’s an easy, doable preventive maintenance checklist to keep your heating and cooling system in top shape.
Image: Amy McBennett for HouseLogic
It’s a good idea to hire an HVAC company to inspect and do maintenance on your system every fall and spring. They’ll do things like inspect and clean the wiring and mechanisms of the air conditioner and furnace, which are a bit more challenging for the average homeowner.
But you can prolong the life and increase the efficiency of your system if you follow this simple HVAC maintenance plan:
Image: HouseLogic
Some things you should do immediately; other tasks only need to be done seasonally or once a year.
10 Steps That’ll Prolong Your HVAC’s Life
1. Buy a better filter if you haven’t already. The new high-efficiency pleated filters have an electrostatic charge that works like a magnet to grab the tiniest particles — even those that carry bacteria.
2. Replace the filter at least every 90 days. But check it monthly. If it looks dark and clogged, go ahead and change it. If you have pets, you’ll probably need to change it monthly.
3. Make sure there’s at least two feet of clearance around outdoor air-conditioning units and heat pumps.
4. Remove debris, such as leaves, pollen, and twigs weekly during spring, summer, and fall from top and sides of outdoor air-conditioning units and heat pumps. Don’t allow the lawn mower to discharge grass clippings onto the unit.
5. Monthly, inspect insulation on refrigerant lines leading into the house. Replace lines if missing or damaged.
6. Make sure unit is level. Annually, ensure that outdoor air-conditioning units and heat pumps are on firm and level ground or pads.
7. Stave off clogs. Annually, pour a cup of bleach mixed with water down the air-conditioner condensate drain to prevent buildup of mold and algae, which can cause a clog.
8. Shut off the water supply to the furnace humidifier in summer. In fall (or when you anticipate turning on the heat), replace the humidifier wick filter, set the humidistat to between 35% and 40% relative humidity, and turn on the water supply.
9. Never close more than 20% of a home’s registers to avoid placing unnecessary strain on the HVAC system.
10. Replace the battery in your home’s carbon monoxide detector annually.
“Visit HouseLogic.com for more articles like this. Reprinted from HouseLogic.com with permission of the NATIONAL ASSOCIATION OF REALTORS®.”
Help your deck field what winter throws at it by re-staining it this month. September’s cooler temps and lower humidity make it the ideal time for this project.
Check Fire Extinguishers
Image: CSA Images/Mod Art Collection/Getty
According to the Red Cross, fires increase in the fall and winter. Keep your home fire safe by getting your fire extinguishers checked by a certified professional. Fire extinguishers do break down and malfunction. In fact, after six years they need to be emptied and reloaded. If you haven’t already, buy one for each floor — and the garage.
Aerate your lawn, reseed or fertilize it if needed, and plant perennials and shrubs (often on sale now). Your lawn will green up faster after winter, and the shrubs and perennials will have a chance to establish roots before the first freeze.
Spending money on roof repairs is no party, but neither is handing out buckets to the family to catch leaks in a winter storm. Inspect your roof — and other big-ticket items, like siding, grading, and gutters — before you’ve got problems. You’ll cut costs by fixing them now and stay dry and warm all winter long.
“Visit HouseLogic.com for more articles like this. Reprinted from HouseLogic.com with permission of the NATIONAL ASSOCIATION OF REALTORS®.”


