7 Tips and Tricks to Keep Your Home Cleaner Longer

Use humidity, a car product, and more ‘wow’ ideas to save cleaning time.

Goldfish crackers spread and broken on gray carpet
Image: Micco Caporale for HouseLogic

When cleaning your home, why not do it in such a way that’ll keep your home cleaner with less effort?

Here are 7 ways to keep your house spring-clean fresh all year long:

#1 Use Humidity to Defy Dust

Low humidity levels cause static electricity. Not only does static attract dust, it makes the dust stick, so it’s difficult to remove. High humidity causes problems, too. It’s an ideal environment for dust mites. These microscopic critters are a double threat: They’re a common allergen, and they contribute to dust production. There are as many as 19,000 dust mites in half a teaspoon of house dust, according to the American College of Allergy, Asthma, and Immunology. Yuck!

What to do: Keep your home’s humidity level between 40% and 50%. That’ll eliminate static while decreasing dust mite growth. 

Tip: About 80% of dirt in homes walks in from the outside. Stop dirt with a bristly doormat before it’s tracked inside.

#2 Apply a Car Product to Keep Shower Doors Scum-Free

You can eliminate soap scum buildup by coating your glass shower doors with a rain-repellent product made for car windshields. When applied to glass, these products create an invisible barrier that causes water, oils, and debris (like soap suds) to bead and roll off.

A glass shower door with soap scum
BEFORE
A clean glass shower door
AFTER

Image: unOriginal Mom

What to do: Find this product anywhere that sells basic auto supplies. You’ll know it’s time to reapply when water stops beading on shower doors. Keep in mind, windshield rain repellents were made to treat glass, not plastic, so only use them on a glass door.

Another option: Automatic shower cleaners claim to let you clean your shower and tub less frequently — like every 30 days. After you finish bathing, the gadget will douse your shower and tub with a cleanser that prevents soap scum buildup while combating mold and mildew. You can buy automatic shower cleaners at most big-brand retailers, like Target and Walmart.

#3 Seal Your Stone Countertops

Natural stone countertops, including granite and marble, are porous, so if they’re not sealed, liquids like red wine, juice, or soy sauce can stain them. A countertop sealer repels stains by causing spills to bead instead of get absorbed. Most countertops are sealed when installed, but the sealant does wear down.

What to do: To keep your countertops in tip-top shape, reapply sealer twice a year. To see if you need a fresh coat, pour a tiny bit of water on your natural stone countertop. If the water doesn’t bead or doesn’t stay beaded for two to three minutes, it’s time to reseal.

Shopping for stone countertops? Slabs with lots of swirls or veins tend to be more porous, and, therefore harder to keep clean.

#4 Use Protectants on Furniture and Carpets

Protective furniture sprays and carpet sealants, like Scotchgard and Ultra-Guard, guard against inevitable spills by causing liquids to bead on the surface instead of being absorbed.

Some of these products also protect fabrics from fading and resist mold, mildew, and bacteria.

What to do: Apply the appropriate sealer once a year after a deep upholstery and carpet cleaning.

#5 Clean Your Oven the Old-Fashioned Way

Forget oven cleaners that promise an easy job. Most cleaners give off noxious fumes and make a horrible mess. The basic ingredient in many oven cleaners is lye, which can burn your eyes and your skin; it’s usually fatal if swallowed.

What to do: Use a wet pumice stone to scrape off dirt and grease. It’s faster than oven cleaner and toxin-free.

Tip: Need to wipe your range or anything else down? You can bust filth faster by heating up a clean, damp sponge or cloth in a microwave for 30 seconds before wiping with or without a cleaning product. Put on rubber gloves before you pick up that hot sponge.

#6 Do Quick Touch-Ups

Small cleaning projects prevent filth from building up. When you spot clean daily, you can prevent smudges from staining, banish dust bunnies, and even combat allergens.

Dry sweeper cloths, sponges, and cloth on a wood table
Image: Anne Arntson for HouseLogic

What to do: Create a spot-cleaning kit so you can address small, dirty situations in minutes.

  • Cleaning pads are great for eradicating dirty fingerprints on walls and light switches. 
  • Damp micro-cloths can reduce airborne dander when used daily to wipe down pets.
  • Dry sweeper cloths can quickly pick up dust and dry dirt off floors, shelves, and electronics.

Tip: Keep stored items cleaner longer by shutting closets, cabinets, and drawers, so circulating dust and dirt can’t get in.

#7 Update Your Light Bulbs

OK, It’s not really cleaning. But good lighting can make you and your home look and feel great — and help you spot that spill before it gets funky.

A room lit with low-wattage incandescent bulbs and compact fluorescents can look dark and dingy. “Daylight” bulbs brighten things up. These full-spectrum light bulbs mimic natural light, so they give better visual accuracy. Bonus: Like sunlight, these bulbs can boost your mood.

What to do: When shopping for bulbs, look for those marked “daylight” that have a range between 5,000 to 6,500 kelvins.

“Visit HouseLogic.com for more articles like this.  Reprinted from HouseLogic.com with permission of the NATIONAL ASSOCIATION OF REALTORS®.”

Posted in Real Estate News | Tagged , , , , , , , , | Comments Off on 7 Tips and Tricks to Keep Your Home Cleaner Longer

How to Cool a Room Without AC

Want summer comfort but hate the AC? Follow these tips on how to keep your house cool without frosty air conditioning.

Dog sitting in front of fan keeping cool
Image: Melanie DeFazio/Stocksy

These tips will help you cool a house without AC, which will save energy (and avoid AC wars with your family).

How to Cool a Room Without AC

When sunlight enters your house, it turns into heat. You’ll keep your house cooler if you reduce solar heat gain by keeping sunlight out.

Close the drapes: Line them with light-colored fabric that reflects the sun, and close them during the hottest part of the day. Let them pillow onto the floor to block air movement.

Add awnings: Install them on south- and west-facing windows to reduce solar heat gain by up to 77%, says the U.S. Department of Energy. Make your own by tacking up sheets outside your windows and draping the ends over a railing or lawn chair.

Install shutters: Interior and exterior shutters not only reduce heat gain and loss, but they also add security and protect against bad weather. Interior shutters with adjustable slats let you control how much sun you let in.

Apply high-reflectivity window film: Install energy-saving window films on east- and west-facing windows, which will keep you cool in summer, but let in warming sun in the winter. Mirror-like films are more effective than colored transparent films.

Open Those Windows

Be sure to open windows when the outside temperature is lower than the inside. Cool air helps lower the temps of everything — walls, floors, furniture — that will absorb heat as temps rise, helping inside air say cooler longer.

To create cross-ventilation, open windows on opposite sides of the house. Good ventilation helps reduce VOCs and prevents mold.

Turn Up Fans

Portable fans: At night, place fans in open windows to move cool air. In the day, put fans where you feel their cooling breezes (moving air evaporates perspiration and lowers your body temperature). To get extra cool, place glasses or bowls of ice water in front of fans, which will chill the moving air.

Ceiling fans: For maximum cooling effect, make sure ceiling fans spin in the direction that pushes air down, rather than sucks it up. Be sure to turn off fans when you’re not in the room, because fan motors give off heat, too.

Whole house fans: A whole-house fan ($1,000 to $1,600, including installation) exhausts hot inside air out through roof vents. Make sure your windows are open when you run a whole-house fan.https://html5-player.libsyn.com/embed/episode/id/17234180/height/90/theme/custom/thumbnail/yes/direction/forward/render-playlist/no/custom-color/000000/

Power Down Appliances

You’ll save money and reduce heat output by turning off appliances you’re not using, particularly your computer and television. Powering down multiple appliances is easier if you connect them to the same power strip.

Don’t use heat- and steam-generating appliances — ranges, ovens, washers, dryers — during the hottest part of the day. In fact, take advantage of the heat by drying clothes outside on a line.

Plant Trees and Vines

These green house-coolers shade your home’s exterior and keep sunlight out of windows. Plant them by west-facing walls, where the sun is strongest.

Deciduous trees, which leaf out in spring and drop leaves in fall, are best because they provide shade in summer, then let in sun when temperatures drop in autumn. Select trees that are native to your area, which have a better chance of surviving. When planting, determine the height, canopy width, and root spread of the mature tree and plant accordingly.

Climbing vines, such as ivy and Virginia creeper, also are good outside insulators. To prevent vine rootlets or tendrils from compromising your siding, grow them on trellises or wires about 6 inches away from the house.

Speaking of shade, here are smart, inexpensive ideas for shading your patio.

Want more tips for staying cool this summer? Substitute CFL and LED bulbs for hotter incandescent lights.

Also, try insulating your garage door to prevent heat buildup.

“Visit HouseLogic.com for more articles like this.  Reprinted from HouseLogic.com with permission of the NATIONAL ASSOCIATION OF REALTORS®.”

Posted in Real Estate News | Tagged , , , , , , , , | Comments Off on How to Cool a Room Without AC

5 Awesomely Easy Landscaping Projects

No need for fancy DIY skills, a lot of money, or a ton of time to pull off these yard upgrades.

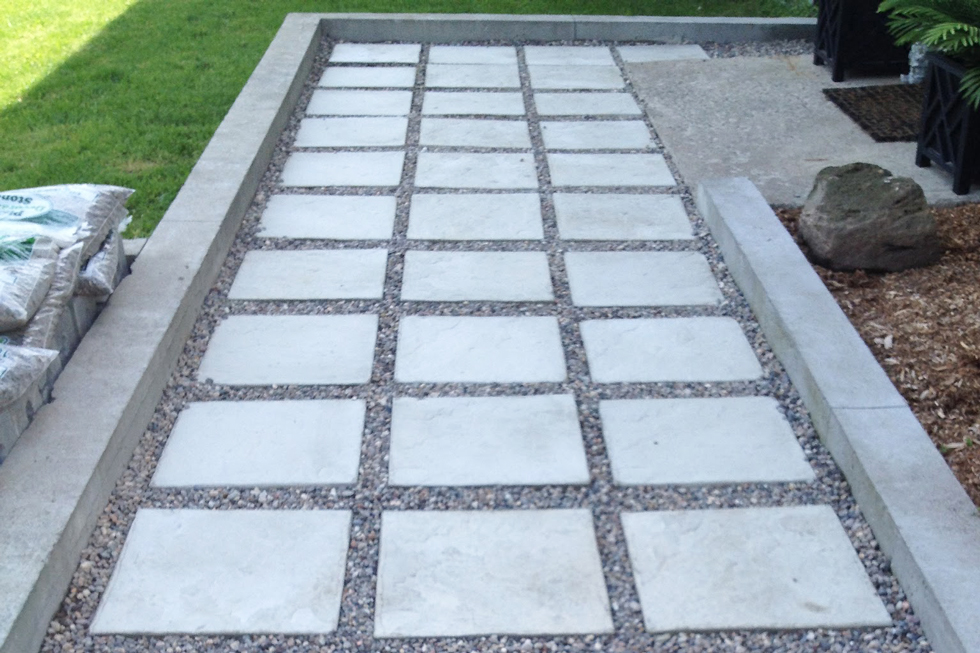
Stone and gravel front walkway to home
Image: Megan West, Interior Stylist

It’s your yard — yours to do with as you wish. And while that’s great, that doesn’t mean you have to be one of those people who spend every spare moment in their yard, sprucing it up

But, still, your landscaping could use a little something. But something easy. 

Here are five totally doable projects that your budget will barely notice, but your neighbors definitely will:

#1 Add Some (Tough) Edging

Rigid flowerbed edging
Image: Paul Gerritsen/Shutterstock

Tell your grass who’s boss with edging that can stand up to even the crabbiest of all crabgrasses. 

But don’t make the mistake that many homeowners make of buying the flexible plastic stuff, thinking it will be easier to install. It’ll look cheap and amateurish from day one.

Worse, it won’t last. And before you know it, you won’t be able to tell where your garden bed ends and your “lawn” begins.

Instead buy the more rigid, tough stuff in either fiberglass, aluminum, or steel.

Tips on installing edging:

  • Lay out a hose in the pattern you want.
  • Sprinkle flour or powdered chalk to mark the hose pattern.
  • Use a lawn edger (or spade) to make an incision for the edging.
  • Tap the edging into the incision with a rubber mallet.

The cost? Mostly your time, and up to $2.50 a square foot for the edging.

#2 Create a Focal Point with a Berm

Berm built in front yard
Image: Jon Jenks-Bauer

A berm is a mound of gently sloping earth, often created to help with drainage. You can also build them to create “island beds,” a focal point of textures and colors that are so much more interesting than plain ol’ green grass. 

Plus, they’ll give you privacy — and diffuse street noises. What’s not to like about that? Especially if you live in a more urban area.

For most yards, berms should max out at 2-feet high because of the space needed to properly build one.

They need a ratio of 4-6 feet of width for every foot of height. That’s at least 8 feet for a typical 2-foot-high berm. So be sure you have the room, or decrease the height of your berm.

Popular berm plantings include:

  • Flowering bushes, such as azaleas
  • Evergreens, such as blue spruce 
  • Perennials such as periwinkle
  • Tall, swaying prairie grasses
  • Lots of mulch to keep weeds away

Save on Soil

Soil costs a whole lot less in bulk — $20 / cubic yard vs. almost $70 for the same amount in bags from a big-box store. Even with a delivery fee, you’ll come out ahead.

The cost? Usually less than $300, depending on how big you make it, how much soil you need to buy to get to your desired height, and which plants you choose.

#3 Make a Flagstone Wall

Aim to build a wall no more than 12 inches tall, and it becomes a super simple DIY project — no mortar needed at all! 

Rock wall around raised flower bed
Image: Stranded in Cleveland

How to build an easy flagstone wall:

  • Dig a trench a couple of inches deep and wide enough to accommodate the flagstones.
  • Fill with pea gravel and/or sand and tamp to make level.
  • Lay out the flagstones to see their shapes and sizes.
  • Stack the smaller stones first.
  • Save the largest, prettiest flagstones for the top layer.
  • Backfill with gravel.

Choose a stone of consistent thickness. Flagstone might be limestone, sandstone, shale — any rock that splits into slabs. 

The cost? About $300 for stones and sand (a ton of 2-inch-thick stone is enough for a wall 10 feet long and 12 inches high).

#4 Install a Path with Flagstone or Gravel

There’s something romantic, charming, and simply welcoming about a meandering pathway to your front door or back garden — which means it has super-huge impact when it comes to your home’s curb appeal. 

You can use flagstone, pea gravel, decomposed or crushed granite, even poured concrete (although that’s not easy to DIY). 

A few tips for building a pathway:

  • Allow 3 feet of width for clearance.
  • Create curves rather than straight lines for a pleasing effect.
  • Remove sod at least 3 to 4 inches deep to keep grass from coming back.
  • If you live in an area with heavy rains, opt for large, heavy stones.

The cost? Anywhere from a couple of hundred bucks to upwards of $500 depending on the material you use, with decomposed granite being the least expensive, and flagstone (also the easiest of the bunch to install) the costliest. https://www.youtube.com/embed/J1gIoLElJYw?feature=oembed&enablejsapi=1Stefan Grunkemeier

#5 Build a Tree Surround

Stone tree surround
Image: Clean Green Landscape

Installing a masonry surround for a tree is a twofer project: It looks great, and it means you’ve got less to mow. Come to think of it, it’s a threefer. It can work as extra seating when you have your lawn party, too! 

All it takes is digging a circular trench, adding some sand, and installing brick, cement blocks, or stone. Just go for whatever look you like best. 

The trickiest part is getting an even circle around the tree. Here’s how: 

  1. Tie a rope around the tree, making a loop big enough so that when you pull it taut against the tree, the outer edge of the loop is right where you want the surround to be. 
  2. Set your spade inside the loop with the handle plumb — straight up and down. Now, as you move around the tree, the loop of rope keeps the spade exactly the same distance from the base of the tree, creating a nice circle.

Then build the tree surround:

  • Dig out a circular trench about 8 inches deep and 6 inches wide. 
  • Add a layer of sand. 
  • Set bricks at an angle for a saw-tooth effect or lay them end-to-end.
  • Fill the surround with 2 to 3 inches of mulch.

The cost? Super cheap. You can do it for less than $25 with commonly available pavers and stones. 

“Visit HouseLogic.com for more articles like this.  Reprinted from HouseLogic.com with permission of the NATIONAL ASSOCIATION OF REALTORS®.”

Posted in Real Estate News | Tagged , , , , , | Comments Off on 5 Awesomely Easy Landscaping Projects

12 Smart Ideas for Dealing With the Paint Shortage

Paint is the latest item to be derailed by supply chain problems. Here’s how to navigate the paint shortage and higher paint prices.

paint shortage ideas bright paints on a colorful background
Image: Anna Efetova/Getty

This just in: The latest supply chain problem is a paint shortage. More specifically, house paint. Interior, exterior, latex, and oil. All colors. All brands. Primer is in short supply, too. 

Like other supply chain disruptions, the paint shortage has stemmed from an array of factors around the globe. The ongoing COVID-19 pandemic has caused labor shortfalls at paint plants and trucking companies, slowing production and delivery. Power outages caused by the epic February 2021 freeze in Texas slowed petroleum production and destroyed the existing supply of resins, key ingredients in paint. Then Hurricane Ida shut down petroleum production in Louisiana in summer 2021. Throw in a fire at a paint polymer plant in Germany in March 2021, and you’ve got a paint shortage.

At the same time, demand for paint has soared. Most of us decided we needed to improve or repair our homes once we started working from them because of COVID. Sales at paint and wallpaper stores hit all-time highs in 2021. With demand up and supply down, you’re going to have trouble finding paint for your remodeling project, and when you find it, you’ll pay more. 

“We’ve seen a 25% increase in paint prices in the last year,” says Travis Nolan, owner of Old Crow Painting in Tampa, Fla. He’s had a hard time finding paint, too, he adds. It took seven months to track down the 80 gallons of primer he needed to cover the exterior of a house he was hired to paint. “It’s been tough to manage the paint shortages and price increases.” 

The paint shortage isn’t likely to improve any time soon. Sherwin Williams, the largest paint manufacturer in the U.S., says it’s uncertain when paint production will be back to normal.

You’re wondering, “So, how am I going to get rid of these outdated red walls in my kitchen?!”  We asked some painting pros for tips on handling the shortage. Here’s what they said.

#1 Buy paint in bulk and buy early.

If you are DIY-ing it, order your paint four to six weeks before you start your project, Nolan says. And buy enough to do the entire job. “You don’t want to run out of paint mid-project,” he says. If you’re hiring a professional painting company, call them now. That gives them time to get you on their schedule and order your paint, he adds. The painting pros we talked to report they’re running two to six months out on painting jobs, so plan ahead. There’s no room for spontaneous painting during a paint shortage.

#2 Paint only the problem areas.

Sometimes you don’t need to repaint an entire room to make it look better. You just need to touch up the problem areas, and it’s easier to find a small supply of paint. “If your paint has dodgy patches, address those,” says Katie Mills, an interior designer and editor at Poshh, an online seller of luxury home items. Interior walls get the most wear around doors. If you have pets and children, the lower third of the walls take a beating. If you kept your leftover paint, good for you! Use it to cover the scuffs and worn areas. If you didn’t, scrape a chip of paint off an inconspicuous area and take it to a paint store so they can color match with their spectrophotometer. 

#3 Clean your walls, baseboards, and trim.

You can sometimes freshen a room’s appearance just by giving the painted surfaces a good scrub, no repainting needed. “You can make your room look better until you can source paint,” says Mills of Poshh. 

#4 Paint an accent wall.

Does the paint shortage have you worried about how to cover all four walls of your room? Paint one wall a bright color that complements the other three walls. You’ll freshen the room’s appearance with less than a gallon of paint.

#5 Be flexible when choosing a paint brand.

“You may love a brand of paint, but it just may not be available,” says Geoff Sharp, president of Columbus, Ohio-based Sharper Impressions Painting. “Try a new store, brand, or a different line of paint.” If you absolutely must have Sherwin Williams 2022 paint color of the year, Evergreen Fog, but you can’t get it, most paint stores can match other companies’ paint colors. Take them a swatch and let them work their computer-driven magic.

#6 Stick with same brand for the whole job if possible.

Use the same brand of paint for your entire job or the colors might not match, says Matt Kunz, president of Five Star Painting, a Waco, Texas, company with 231 locations in North America. To get a precise match, it’s best to buy paint that came from the same run and at the same store, Nolan says. But if you need the paint pronto and can tolerate possible color variation, you can be more flexible.

#7 Hire a professional painter to leverage their buying power.

If you have a big job, a painting contractor has the buying power to track down the paint you need. Otherwise, you’ll likely have to drive all over town looking for paint or Google “latex paint near me” till the wee hours. A pro has a supplier network and a national buying account. “We place orders well in advance of our need, so we haven’t been as affected by the shortage as the average DIYer,” says Five Star Painting’s Kunz.

#8 Use recycled paint.

“Recycled paint is a little-known alternative to new paint,” says “says Ezra Laniado, owner of Landmark Construction & Development in Los Angeles. It’s made by reprocessing and remixing leftover latex paint. There aren’t as many color choices in recycled paint, and it can’t be custom tinted, he explains. But it’s just as durable as virgin paint, good for the environment, and available. Recolor is one of the best-known brands of recycled paint, and you can buy it in interior and exterior formulas. 

#9 Consider wallpaper instead of paint.

Wallpaper has come a long way from Great-Aunt Mabel’s cabbage rose-covered bedroom walls. It’s easier to hang and remove quickly without harming the walls, and it’s better for the environment. It’s also hot right now, available in all kinds of patterns and colors, according to interior design pros. That’s good news for paint-shortage plagued homeowners. You can transform a room by decking out a wall with a punchy print. Wallpaper the whole room or do an accent wall. Don’t want to commit to permanent wallpaper? Go with the peel-and-stick stuff that’s easy to remove when you’re ready for a change.

#10 Power wash your home’s exterior before you paint.

As with the interior, a good cleaning of your home’s exterior may be enough to freshen the appearance until you can repaint. “You can make your home look better, fast,” says Kunz of Five Star Painting.

#11  Paint just the front of your house.

Nolan suggests painting just the front of your house because that’s what shows. “You’ll make your house look nice, and you can follow up and do the rest of the house later,” he says. This is a good solution if you’re about to sell your house and need to boost your curb appeal

#12 Put a clear topcoat over your exterior paint.

Freshen up your home’s exterior by putting a clear topcoat over the paint. “It will make the paint color more vibrant and protect it from the elements until you can repaint,” Nolan says. The paint shortage hasn’t affected clear topcoats, he adds. And when you’re ready to repaint, you can put the fresh coats of paint on top of the topcoat.

The upshot: You can still paint your house during this supply chain mayhem. You’ll just have to plan ahead, pay higher paint prices, and be flexible in your choices. 

“Visit HouseLogic.com for more articles like this.  Reprinted from HouseLogic.com with permission of the NATIONAL ASSOCIATION OF REALTORS®.”

Posted in Real Estate News | Tagged , , , , , , , , , , | Comments Off on 12 Smart Ideas for Dealing With the Paint Shortage

6 Kitchen Materials Savvy Remodelers Never Use

Durability is key for kitchen remodeling, but it doesn’t have to cost a lot.

unique-kitchen-vintage-materials-tile-stove-range-copper
Image: Michael Hall/Getty

About to remodel that old kitchen? Unless you’re cool with treating the hardest working room in your house like a museum exhibit, resist the temptation to buy the cheapest or shiniest materials available. Instead, go for durable options that can stand up to regular abuse.

Trust us: Although it may be tough to leave that raised, tempered glass bar top (ooh!) in the showroom, repairing its first (and second and third) chip will get old. Very fast.

Picking the right materials is easy if you do your homework. “There are amazing products out there,” says Jeffrey Holloway, a certified kitchen designer and owner of Holloway Home Improvement Center in Marmora, N.J. “You’re looking at price point, sanitation, how easy it is to clean the product, its durability, and maintenance.”

Keeping those all-important features in mind, here are some materials to avoid during your next kitchen project.

#1 Plastic Laminate Counters

First off, there’s plenty of great laminate out there. It’s the entry-level, plastic laminate you want to stay away from, Holloway says. These are the ones that look thin and dull, as opposed to richly textured. They scratch easily, and if the product underneath the laminate gets wet (say, from steam rising from your dishwasher), it can delaminate the countertop. That means the edges will chip pretty easily.

Also, one misplaced hot pan on the plastic will result in a melted disaster zone you’ll remember forever.

But if you’re watching your budget, plastic laminate at the next level up is a good choice. “It’s got good color consistency, and there are a lot of retro and trendy patterns available,” says Dani Polidor, an interior designer and owner of Suite Artistry, and a REALTOR® in Pittsford, N.Y.

New laminate counter technology offers scratch resistance, textured surfaces, and patterns that mimic real wood and stone. “There are even self-repairing nanotechnologies embedded in some laminates,” says Polidor. “Other laminates have antimicrobial properties.”

A pro can install high-end laminate for 30 square feet of counter space for about $2,000. Laminate-type material with an antimicrobial finish costs an average $15 to $30 per square foot, according to FixR.

#2 Inexpensive Sheet Vinyl Flooring

You spend all day stepping on your floor, so quality really matters. At the lower price point, about $3 per square foot without installation, the cheapest sheet vinyl floorings tend to be thin.

“If your vinyl floor is glued down and the underlayment gets delaminated, say, by water seeping from your dishwasher or refrigerator, you’ll get bubbles in your floor,” Holloway warns.

Compare that with luxury vinyl tile, which costs about $11 per square foot without installation.

It’s still usually glued down, but it’s a little more forgiving than its less classy cousin. It can come in tiles, which you can grout so they mimic the look of higher-end stone, Polidor says.

#3 Some Laminated Cabinet Fronts

Holloway suggests staying away from lower-end thermofoil cabinet fronts. What is thermofoil? Contrary to its name, there’s no foil or any metal-type material in it. It’s actually vinyl that’s heated and molded around fiberboard. If the cabinet is white and the price is waaaaay affordable compared with other cabinets, think twice. Cheaper thermofoil has three critical drawbacks:

1. It’s not heat resistant. If near a dishwasher or oven, it could delaminate.

2. It can warp and yellow with age, revealing its cheapness.

3. The “wood” underneath the thermofoil is also poor quality and won’t hold up over time.

But just as with plastic laminate, science has made great strides, and a host of new cabinets are remaking thermofoil’s reputation. “New European laminates have become all the rage for the clean-lined, flat-panel look,” Polidor says. “They’re budget-friendly and can look like wood or high gloss. It’s not your grandmother’s thermofoil.”

And it doesn’t come at Grandma’s prices, either. But the new thermofoil is much more affordable than custom cabinets (see more on this, below) and still satisfies with its rich look and durability.

#4 High-Gloss Lacquered Cabinets

A nice shine can be eye-catching. And spendy. About 20 layers of lacquer go on a cabinet for the high-gloss look. Ding it or scratch it, and it’s costly to repair.

“It’s a multi-step process for repairing them,” Polidor says. A better option for the same look is high-end thermofoil. (See? We said there were good thermofoil options!)

Thermofoil has a finish that’s fused to the cabinet and baked on for a more durable exterior. And it’s way more budget-friendly. This option costs $250 to $350 per cabinet, depending on the style, size, and color. To have a pro apply lacquer to your cabinets, expect to pay $50 to $100 per linear foot. For an average kitchen with 20 linear feet of cabinets, that works out to $1,000 to $2,000.

#5 Flat Paint

Flat paint has that sophisticated, velvety, rich look we all love.

But keep it in the bedroom. It’s not kitchen-friendly. Flat paint, also known as matte paint, has durability issues. It’s unstable. Try to wipe off one splatter of chili sauce, and you’ve ruined the paint job.

About the only place to use flat paint in your kitchen is on the ceiling (unless, of course, you have a reputation for blender or pressure-cooker accidents that reach to the ceiling; then, we suggest takeout).

Instead, you want to use high-gloss or semi-gloss paint on your walls. They can stand up to multiple scrubbings before breaking down.

#6 Trendy Backsplash Materials

Tastes change. So avoid super trendy colors and materials when permanently adhering something to your kitchen walls. Backsplashes come in glass, metal, iridescent, and high-relief decor tiles, which are undoubtedly fun and tempting. They can also be expensive, ranging from $5 to $220 a square foot, and difficult to install. Pricing varies greatly based on materials, including metal, glass, granite, stone, and marble. After all that work and expense, if (er, when) your taste changes in a few years, it’ll be mighty tough to justify a redo.

Stick with a classic subway tile at $6 to $16 per square foot. Or, even more budget friendly, choose an integrated backsplash that matches your countertop material. “If you want pops of color, do it with accessories,” Polidor suggests.

“Visit HouseLogic.com for more articles like this.  Reprinted from HouseLogic.com with permission of the NATIONAL ASSOCIATION OF REALTORS®.”

Posted in Real Estate News | Tagged , | Comments Off on 6 Kitchen Materials Savvy Remodelers Never Use

7 Ideas to Make Your Outdoor Living Space Irresistible

Budget ideas to transform your outdoor living space into a beautiful (and fun) retreat.

Outdoor-patio-decor-summer-lounge-grill-relax
Image: CapturedNuance/Getty

Americans are putting their own spin on the Scandinavian passion for open-air living–friluftsliv. We’re not just doing things outside as much as possible. We’re expanding our indoor living space to the outdoors. And that’s increasing the value of homes and adding features buyers are looking for. 

More than 80% of home buyers said patios and front porches are “essential” or “desirable,” according to the “What Buyers Really Want” survey from the National Association of Home Builders (NAHB).

So why not jazz yours up with these outdoor living space ideas on a budget?

#1 Design Your Space To Blur the Line Between Inside and Outside

Creating a seamless transition between your home’s interior and exterior isn’t as simple or low cost as adding some cushy cushions, but it’s seriously the best way to pull you outside more.  

  • The most affordable way: switch out a standard door with french or sliding doors.
  • The wow-way: add weatherproof flooring, such as stone tile or scored concrete, for the space outside and the adjacent room inside

#2 Go Overboard on Comfy

Comfy outdoor seating
Image: Liz Foreman for HouseLogic

Comfy is easy to achieve and can be as low cost as you want. Start simple with a cushion or two or even a throw. A couple more simple starters: 

  • Get some cushy cushions. Make sure they’re outdoor-worthy and can handle downpours.
  • Put down outdoor rugs for barefoot comfort.

#3 Make It Easy to Use All Your Devices

Our devices and electronics have conspired to keep us on lock down inside. Here’s some fun ways to stay charged outdoors: 

  • Get a Wi-Fi antenna to boost your range. 
  • Create a new habit of using solar chargers and you’ll rarely be without juice.
  • Add some wireless speakers for the simplest DIY sound enhancement you could ask for.

#4 Crank Up the Mood Lighting

Outdoor solar walkway lights
Image: Liz Foreman for HouseLogic

Outdoor lighting dresses up your home’s marketability and appeal (exterior lighting is buyers’ second most wanted outdoor feature, according to the NAHB study), makes it safer, and lets you spend more time outside.

  • Use uplighting to highlight trees, architectural details, or other focal points.
  • Add sconces or pendant lights to make evening entertaining, grilling, and reading easier.
  • Illuminate walkways, rails, and steps with landscape solar lights.
  • Hang fairy or string lights to set an enchanting tone.

#5 Personalize It

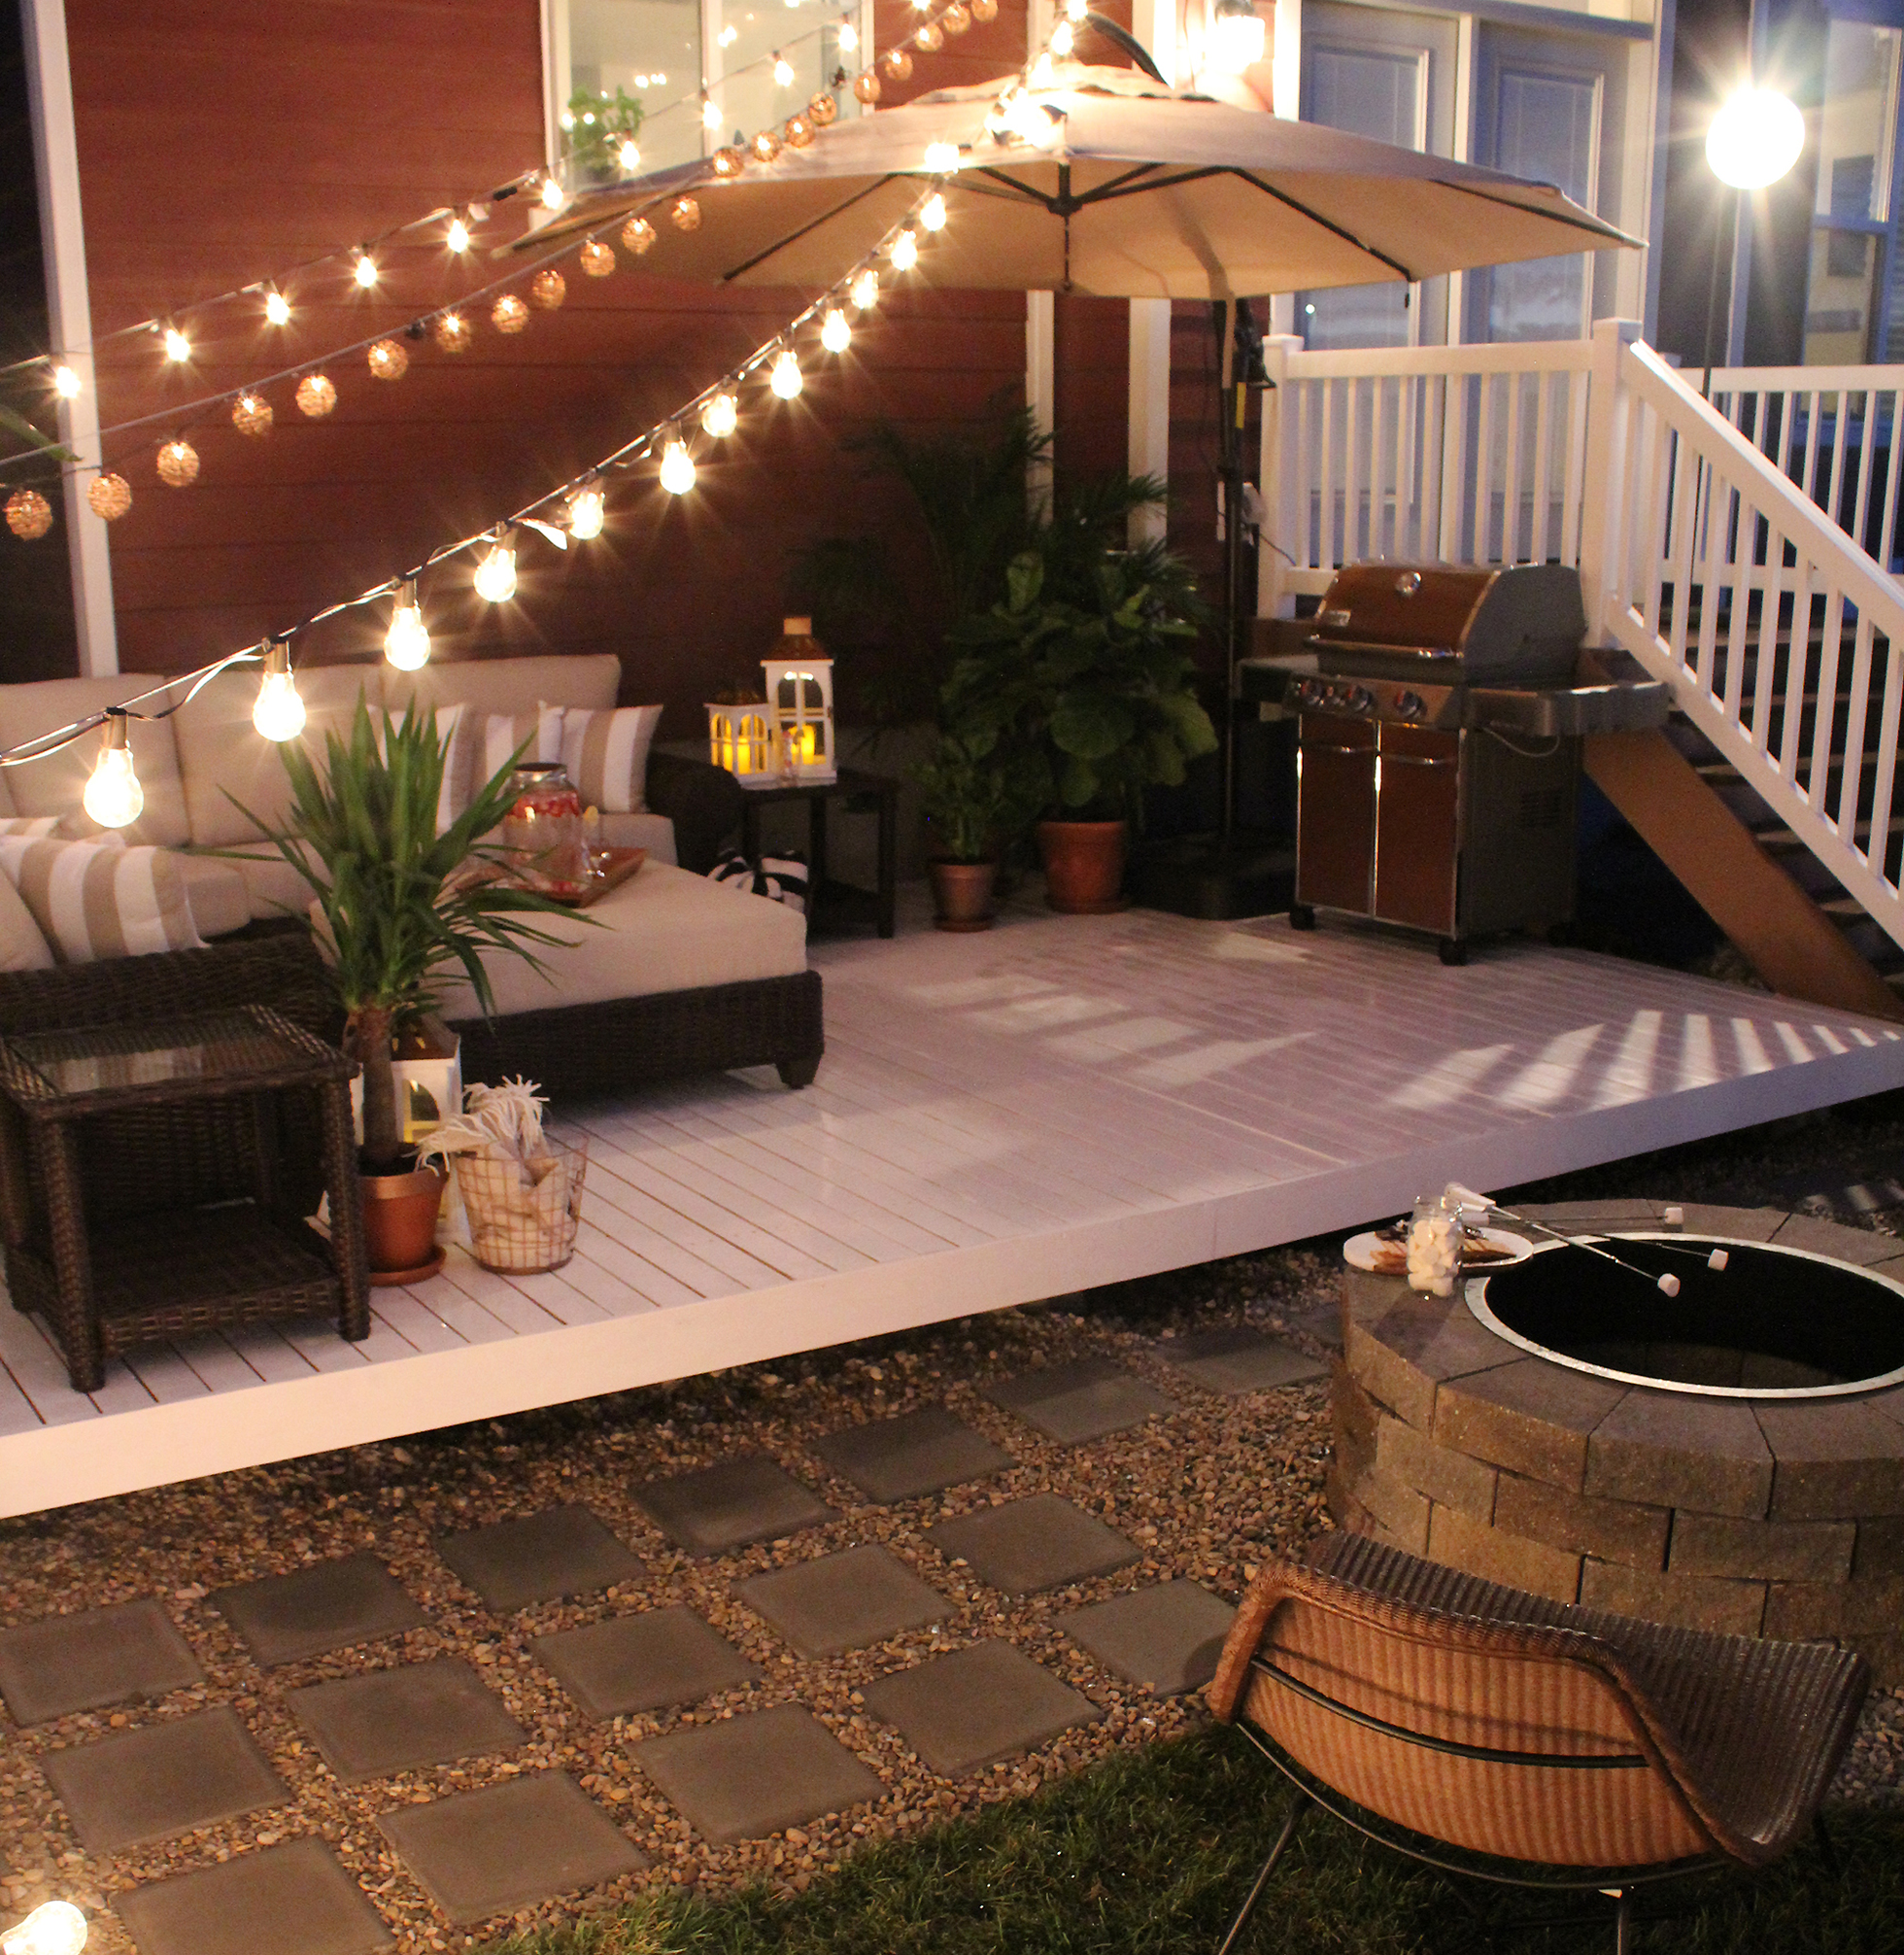
DIY patio pavers
Image: Liz Foreman for HouseLogic
  • Paint a faux rug with your favorite colors.
  • Create a path made with colored glass, brick, or other interesting found materials.
  • Craft a one-of-kind outdoor chandelier.
  • Build a pizza oven, custom seating, or other feature you crave.
  • Add personal décor that makes you happy.

In fact, make your outdoor retreat an ongoing project where you can hone your DIY skills.

#6 Add Some Fun Stuff to Do

Outdoor space with kid-friendly playhouse and DIY chalkboard
Image: Tasya Demers from My House and Home
  • fire pit is a proven winner. Food and fire have brought humans together since the dawn of time.
  • Give wee ones the gift of magical thinking with an outdoor playhouse.
  • Add whimsy with a chalkboard fence that both kids and fun-loving adults will enjoy.
  • Add a doggie window in your fence to entertain Spot. Installing a dog run may even boost your home’s value. FYI: It’s been said that pets are one of the top reasons why people buy houses.

#7 Arm Your Space Against Bugs, Weather

Removable canopy over a home's deck
Image: LizMarieBlog.com
  • Install an awning, canopy, or pergola
  • Rig glass fence windscreens to the keep your BBQ fires burning.
  • Screen in your porch or deck against bugs.

If you already have a screened porch, don’t forget the slats between wood planks. Cover the floor with outdoor carpet or staple screening to the underside of floorboards.

“Visit HouseLogic.com for more articles like this.  Reprinted from HouseLogic.com with permission of the NATIONAL ASSOCIATION OF REALTORS®.”

Posted in Real Estate News | Tagged , , , , , | Comments Off on 7 Ideas to Make Your Outdoor Living Space Irresistible

‘I-Really-Can’t-Deal!’ Patio Problems Solved

Size problems. Shade problems. The wind-is-blowing-our-cocktails-over problems.

Colorful patio at a home
Image: Dabito

Summertiiiime and the living is supposed to be easy — but not if you live on a hot mess of a patio.

Whether it’s dying plants, a view of your neighbor’s garbage cans, or mosquitoes that threaten to drain you before you can drain a beer, patios tend to develop some chill-disrupting problems. Here are some of the more annoying ones and how to fix them.

#1 My Patio Is Too Small

Green plants hanging on a stucco outdoor wall
Image: Warren Keller of @warrensgarden on Instagram

Train a vine to grow up a wall, hang plants from the roof, or set potted plants on shelves on the wall. “Anything that draws the eye upward makes the space feel larger,” says Brian Patrick Flynn, designer from “HGTV Dream Home.”

Tying the patio space visually to your yard will make it feel larger, too. Layer plants around the patio’s edge — short ones at the front and taller ones farther from the patio. Don’t have planting beds? Use containers of plants to get the same effect.

#2 My Patio Is Near a Busy Street

Nothing kills a patio buzz like a swarm of noisy traffic. A masonry wall is the best way block the car horns and sirens, of course, but that’s a large and expensive project.

A cheaper, simpler option: Make a living wall of plants. A dense planting can cut noise by as much as 10%.

Or create your own noise. Try installing a fountain. Even though the sound of gurgling water won’t drown out all the street sounds, it will mitigate them and soothe your noise-battered soul.

Playing music or white noise over an outdoor Bluetooth speaker can also knock down noise. Try some rainforest-themed white noise to make your patio feel like it’s surrounded by jungle birds, not a highway of V-6 engines.

#3 There’s Too Much Shade — I Can’t Grow Anything!

A covered patio with painted concrete floor
Image: Dabito

Yes, you can. You can grow plants that like shade. Ferns, hostas, palms, banana trees, and a gaggle of other plants will adore your shady patio.

They have nice leaves, but don’t bloom much. If you must have flowers, plant them in containers and place them in sunny spots in the yard. Move them on the patio when you have guests over.

If moving 25-pound containers of begonias isn’t your thing (that’s fair), go with fake flowers.

Put a bouquet of iron or wooden yard-art flowers in a pot, hang some flower-themed art on a wall, or upholster your furniture in a botanical print to add color to a patio or deck that’s overcome by shade.

Note: Never use silk flowers. Ever. They’re perfectly suitable for cemeteries, but that’s about it. Unless you’re going for a uniquely morose patio theme, steer clear.

#4 There’s No Shade!

A sail shade is the simplest, fastest, and cheapest solution to provide shelter from the sun. It gives you shade where you want it, when you want it.

If you can wait a year for shade, train vines to grow overhead on a pergola, which is a more permanent (and value-adding) solution than a shade. Not only will the vine shield you from the sun, but it will also lower the air temperature, thanks to the magic of transpiration.

When the air heats up, the vines’ leaves release water into the air. It’s nature’s air conditioning. The best solution: Keep that sail shade up until the vines have covered the pergola.

#5 My Neighbors Are Too Close

A backyard gray trellis with a green flowering vine
Image: The Garden Trellis Company, www.gardentrellis.co.uk

If your neighbor’s gaze is an uninvited guest at every patio party, put space between you and them with plants.

Install a sheet of lattice on the side of your patio closest to the neighbors and train a fast-growing, leafy vine like ivy or jasmine to climb up the side of it. Looks like a garden, acts like a privacy fence.

How’s that for polite but effective? If you want privacy faster, line up a row of big planters filled with tall evergreens along the patio’s edge. Outdoor drapes work, too. Close them when you want some peep-proof outdoor time.

#6 The Wind Is Blowing Our Cocktails Over

See above. A lattice wall or row of heavy planters filled with tall plantings can make a great windbreak as well as a privacy screen.

If your nuisance wind comes from varying directions, put the containers on rolling plant stands and move them so they block the wind as needed. Another solution: Heavy-duty outdoor curtains made of marine-grade fabric with weighted hems.

#7 My Patio Has No View

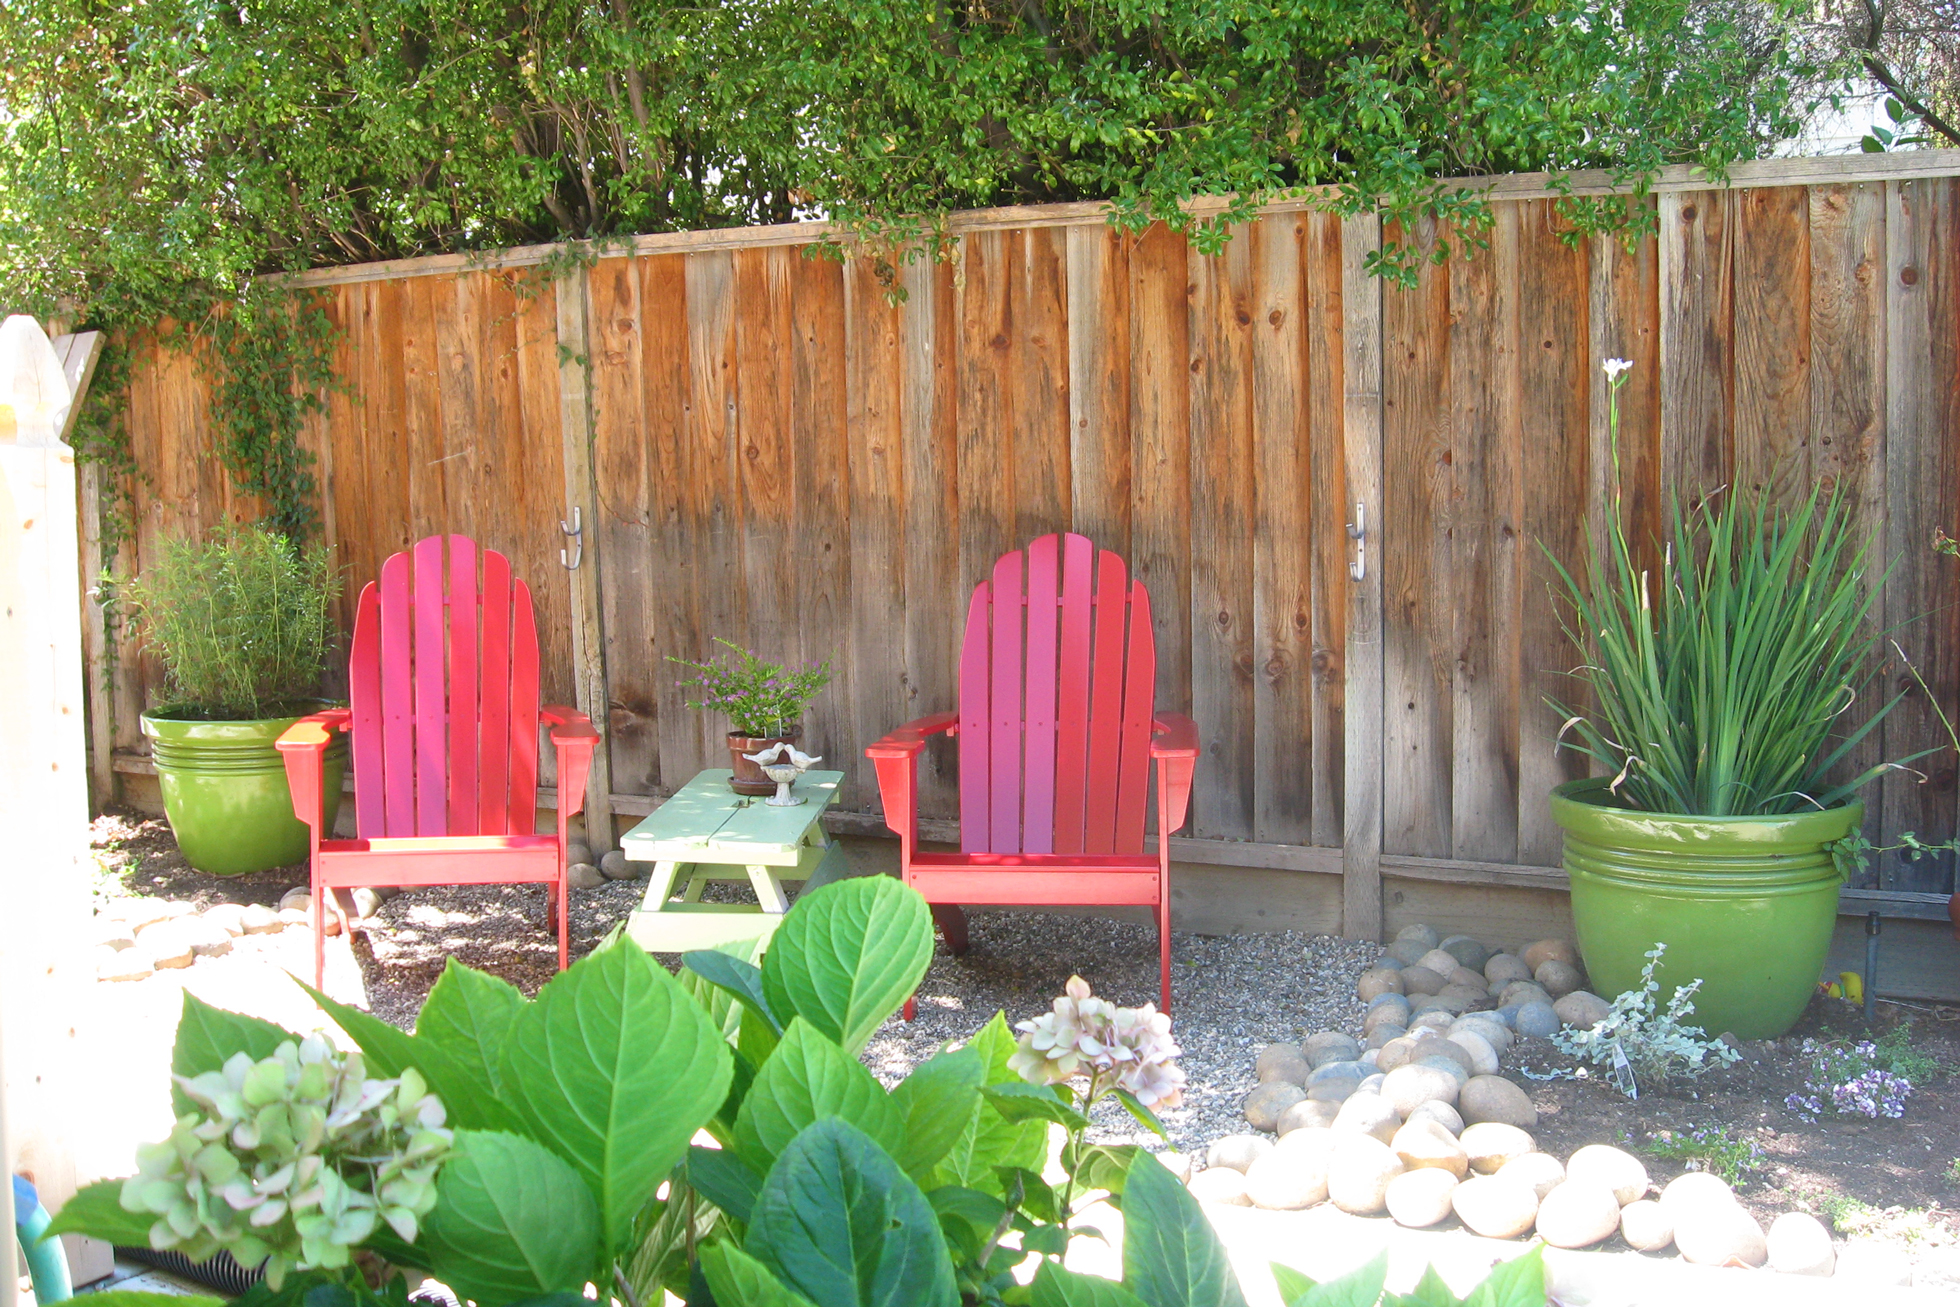
A mirror on a fence in an outdoor space with patio furniture
Image: Stacy Risenmay

In a perfect world, a knockout view is just part of the patio package. In reality, you might be gazing at the neighbor’s swing set or the side of their garage. If painting a sunset mural on the garage is out of the question, adjust your gaze inward, rather than out with a focal point on your patio.

“Hang an outdoor mirror, install a sculpture or water feature, or create a wall covered in unique materials like stacked stone or painted a bright color,” Flynn says. Even stringing twinkly party lights around the edge of the roof, or on your oversized plants, will make your patio more scenic and give you something to look at.

#8 We’re Being Carried Off by Bugs

Cat-shaped birdhouse outside a home
Image: Suck UK

Your gentle breeze is an insect’s hurricane. Make your patio a permanent Category 5 for pests with an outdoor fan. At night, use an LED bulb with a Kelvin rating lower than 3,000. It produces a yellow light that’s less appealing to bugs.

Or battle nature with nature. Invite bats and birds to your yard. They’ll eat the bugs that are trying to eat you. Hang a bird feeder and a bat house, and provide a source of clean water for them to drink. (Use a fountain to keep the water moving, so mosquitoes won’t breed in it.)

And don’t be silly. Bats won’t hurt you. Scare the bejesus out of you, maybe. But you’ll get used to them. The bugs won’t.

“Visit HouseLogic.com for more articles like this.  Reprinted from HouseLogic.com with permission of the NATIONAL ASSOCIATION OF REALTORS®.”

Posted in Real Estate News | Tagged , , , , , | Comments Off on ‘I-Really-Can’t-Deal!’ Patio Problems Solved

Sharp Homeowners Know June Is the Best Time to Do These 5 Things

Like cleaning your siding — just be sure to start from the bottom and go up.

Do This Now illustration arm with watch
Image: Simone Golob/Offset

Could it really be summer?!

Tackle these five summer maintenance tasks during June’s longer days and better weather — and save yourself time and money this winter.

#1 Update Outdoor Lighting

Outdoor stone steps lit with pathway lighting
Image: Rosann M. Kelley, photo/ Outdoor Artisan, Inc., design

In June, winter nights are probably the last thing on your mind. But early summer is the perfect time to plan for those “OMG it’s only 4:30, and it’s already dark ” moments by adding or updating landscape lighting.

The most energy-efficient, easy-to-install option is solar lighting, but it won’t perform as well on dark or snowy days. For light no matter the weather, install electric.

LED bulbs last up to five times longer and also use less energy than comparable bulbs.

#2 Clean Your House’s Siding

Home with bright green painted siding
Image: Kristin Diehl

With a bit of preventive maintenance, your home’s siding will stay clean and trouble-free for up to 50 years. Fifty years! Clean it this month with a soft cloth or a long-handled, soft-bristle brush to guarantee that longevity.

Start at the bottom of the house and work up, rinsing completely before it dries. That’s how you avoid streaks.

#3 Focus on Your Foundation

Brick exterior wall with damage
Image: Martb/Getty

There’s no better time for inspecting your foundation than warm, dry June. Eyeball it for crumbling mortar, cracks in the stucco, or persistently damp spots (especially under faucets). Then call a pro to fix any outstanding issues now, before it becomes an emergency later.

#4 Seal Your Driveway Asphalt

Sealed asphalt driveway at pink house
Image: Cveltri/Getty

Your driveway takes a daily beating. Weather, sunlight, cars, bikes, and foot traffic – all of these damage the asphalt. Help it last by sealing it. Tip: The temperature must be 50 degrees or higher for the sealer to stick, making June a good month for this easy, cost-effective job.

#5 Buy Tools

Lawn tools hanging in a garage
Image: Jo Facer, The Edible Flower

Thanks to Father’s Day, June is the month everyone can get a deal on tools, tool bags, and that multitool you’ve had your eye on. If it’s time to replace a bunch of tools or you’re starting from scratch, look for package deals that offer several at once. These can pack a savings wallop, offering 30% off or more over buying the tools individually.

“Visit HouseLogic.com for more articles like this.  Reprinted from HouseLogic.com with permission of the NATIONAL ASSOCIATION OF REALTORS®.”
Posted in Real Estate News | Tagged , , , , , , , | Comments Off on Sharp Homeowners Know June Is the Best Time to Do These 5 Things

7 ‘Oh Yeahhh’ Projects That Make Your Backyard an Oasis

But not all are equal when it comes to investing in your home.

Man relaxing on a hammock in an urban back yard
Image: Chris Clinton/Getty

After spending so much time at home, you want — you need! — a backyard getaway, not a bootcamp that’s all about mowing, weeding, and raking.

Time for a second honeymoon with these ideas that’ll turn your labor-loving yard into a leisure-loving one. Some will even enhance your home’s value. Others, at least, won’t ding it. (You definitely don’t want to do that.)

Let the backyard oasis begin with these ideas:

#1 Al-Fresco Dining

An outdoor fireplace with wood bench seating on a patio
Image: Alex Staniloff/Gotham Interiors

Ample, built-in seating and wood-fired pizza on-demand. And while wood-fired ovens are famous for pizza, this isn’t a one-note investment: You can serve up any meat, veggie, or bread — making this a full-on outdoor oven. Low-maintenance hardscaping means you can focus on your party, instead of mowing grass.

Or go for the full farm-to-table concept:

Backyard bar with dining table & stock tack vegetable garden
Image: Designed and installed by Jake Moss Designs

Pluck some veggies from some chic, metal raised beds (easy to maintain), prep them in an outdoor cooking island with a built-in grill (and green roof, which keeps it cooler underneath), and treat yourself to the freshest cuisine around for your backyard oasis.

Even better, since the entire ground area is pea gravel, you can spend less time mowing and more time dining.

But does it add value? Outdoor living and cooking spaces (rooms, really) almost always do. As do low-maintenance hardscaping features — like the patio. Raised steel garden beds, not so much, though.

#2 An Outdoor Room Just for Leisure

An outdoor space with patio furniture and a dog
Image: Photo by ADZA

Spend Saturday afternoon napping in your outdoor space — not laboring over it. Easy-care plants look lush with minimal intervention, including ground cover and stone to replace grass.

Install horizontal privacy fencing, and you’re ready for one legendary siesta (adorable dog recommended but not required).

But does it add value? See above about outdoor rooms (and the lovely plants definitely boost it, too). Win-win.

#3 A Yard for Playing

Backyard with firepit and bocce ball court
Image: SOMOS design and landscaping, design/Andrea Calo, photo

You don’t have to give up playing in the backyard just because you’re an adult. Make your yard a grown-up rec center with a fire pit and bocce ball court (or cornhole, ladder ball, even giant Jenga).

Wood-paneled privacy fencing elevates the adults-only aesthetic, and low-maintenance gravel keeps the focus on fun instead of maintenance.

But does it add value? Seriously doubt it (except for the fence). But it’s your yard. Remember, joy is an ROI of a different sort. Plus, the court is easy enough to erase with some basic landscaping (always a good value add).

#4 A DIY Pool and Pit

A stock tank pool and a fire pit with seating in a backyard
Image: John and Caley Duffty of Home Wood Designs

The Truth About Built-In Pools

Funny how something most of us love can actually make a house harder to sell. But that doesn’t mean you shouldn’t.Read More InDo Swimming Pools Add Value to Homes?

An affordable, stock-tank soaking pool paired with a DIY fire pit and seating is everything good about a pool (laps, shmaps, right?), without all the cost and maintenance.

Add a little wood-fired heater, and it’s a hot tub, too (just make sure it’s one designed for hot tubs — for obvious reasons).

But does it add value? Only to you. And since it’s easy enough to remove, it’s not hurting it either. If you love it, you’re getting a whole different kind of ROI — where dollars don’t apply.

#5 A Me-Only Retreat

A Malibu spa day may not fit into your schedule (or budget) this year, but stealing away to this hideaway for 30 minutes at a time can be easily penciled in. Now where’s the “Do not disturb” sign?

Colorful backyard shed
Image: Megan M. Greene, photo/Amber Lee Garrison

But does it add value? Not really, especially since the shed isn’t plumbed and lacks power. But backyard sheds-as-rooms never seem to disappoint buyers.

#6 An Epic Slide

A modern treehouse with a purple slide
Image: Ryan Garvin

Jack up a playhouse with a slide that makes their friends go “Whoa.” And while they’re spending a few hours running up the stairs (or climbing up a cargo net) and racing down the slide, you get some much-deserved “me” time: not a lousy ROI. 

But does it add value? The slide, no. The playhouse? Again, no plumbing, no electricity, probably no gain — but the landscaping is a sure-fire win.

#7 Lighting for After Dark

A backyard with pool and covered patio at night
Image: Donny Mak

Do resorts shut down at dusk? They do not. To make your backyard an all-hours destination, incorporate outdoor lighting into your vision. Forget tiki torches; opt for permanent overhead, task, and mood lighting — just like you would indoors. Efficient solar and LED lights are great for outdoors. With the right glow, you can squeeze even more hours of delight out of your backyard oasis.

“Visit HouseLogic.com for more articles like this.  Reprinted from HouseLogic.com with permission of the NATIONAL ASSOCIATION OF REALTORS®.”

Posted in Real Estate News | Tagged , , , , | Comments Off on 7 ‘Oh Yeahhh’ Projects That Make Your Backyard an Oasis